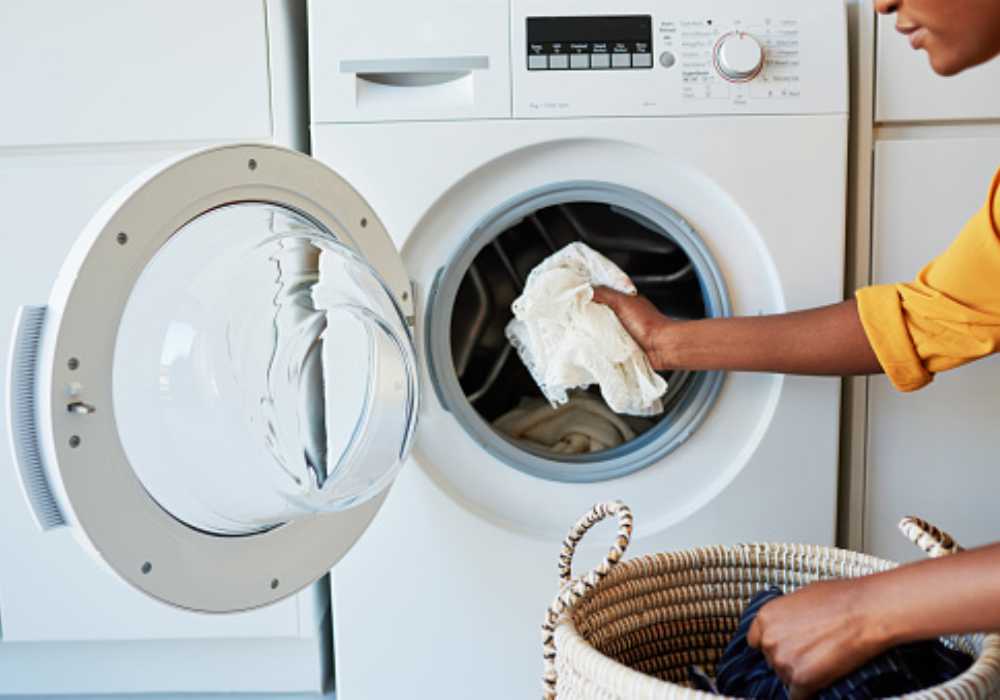
As an Affiliate, We may earn a commission that doesn't cost you extra from qualifying purchases using links in this post. It helps keeps this blog running.
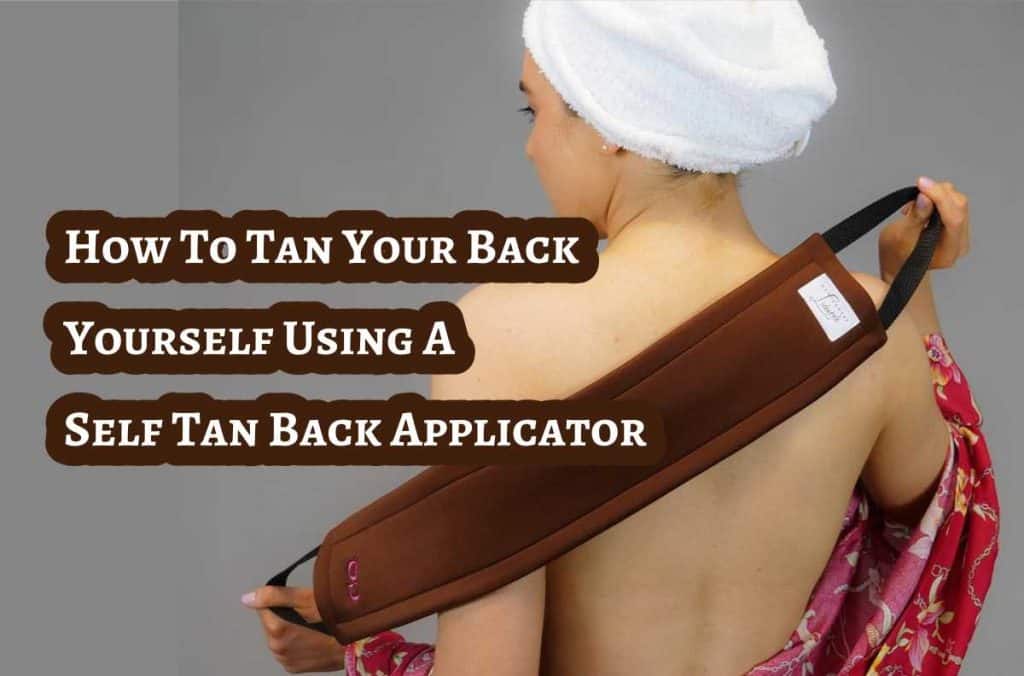
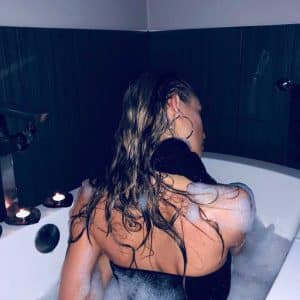
Self-tanning is a great way to get a sun-kissed glow without the harmful effects of UV rays. But if you’re like most people, you probably find it difficult to self-tan your back. That’s where a self-tan back applicator comes in!
When it comes to self-tanning, achieving an even and natural-looking tan can be a challenge, especially when it comes to tanning your back. However, it’s important to know how to tan your back yourself using a self tan back applicator. Self-tanning allows you to achieve a sun-kissed glow without the harmful effects of UV exposure. By learning how to properly apply self-tanner to your back, you can confidently achieve a flawless tan from head to toe.
As we know, tanning your back without any assistance can be quite tricky. You may struggle to reach all the areas evenly and end up with patchy or streaky results. This is where a self tan back applicator becomes essential. Applying self-tanner to your back using a specialized tool ensures that you can reach all the nooks and crannies effortlessly, resulting in a more consistent and professional-looking tan. By extending your reach and maintaining control, the self tan back applicator simplifies the process and helps you achieve a seamless tan application.
Read A Specific Section
Here’s Why You Should Tan Your Back Yourself (The Benefits)
You might say, why stress myself when my boyfriend, husband, or even friends can help me apply tanner to my back? Well, tanning your back yourself offers several benefits that make it worth mastering the technique. Here are some of the importance of using a back applicator for self-tanning:
- Independence: By learning how to tan your back yourself, you become less reliant on others for assistance. You can enjoy the convenience of self-tanning whenever and wherever you desire, without needing someone else to reach those difficult spots.
- Cost-Effective: Going to a professional salon for a spray tan or relying on someone else’s help may incur additional expenses and an unnecessary debt of returning favors. By self-tanning your back yourself, you can save money in the long run by investing in a self tan back applicator and performing the process at home.
- Privacy: Self-tanning allows you to maintain your privacy and comfort. You can have complete control over the tanning process, ensuring that you feel at ease throughout the application.
- Customization: When you tan your back yourself, you have the freedom to customize the shade and intensity of the tan to your liking. You can experiment with different self-tanning products and techniques to achieve your desired outcome.
Remember, mastering the art of self-tanning your back using a self tan back applicator takes practice, but the results are well worth the effort.
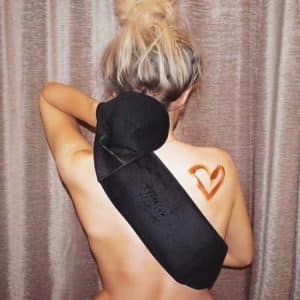
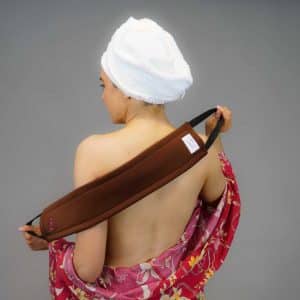
What is A Self Tan Back Applicator?
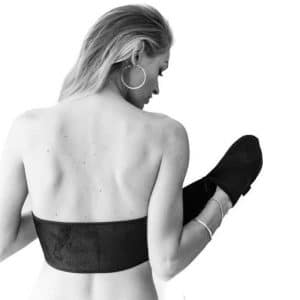
A self tan back applicator is a specialized tool designed to help individuals apply self-tanning lotions to their backs, particularly in hard-to-reach areas on their backs. It’s a game-changer for those who love the convenience and cost-effectiveness of at-home tanning but struggle with reaching certain spots on their backs.
It’s mostly in two designs:
- Back Tan Applicator With Band-Aid Design
- Back Tan Applicator With Sturdy Hand
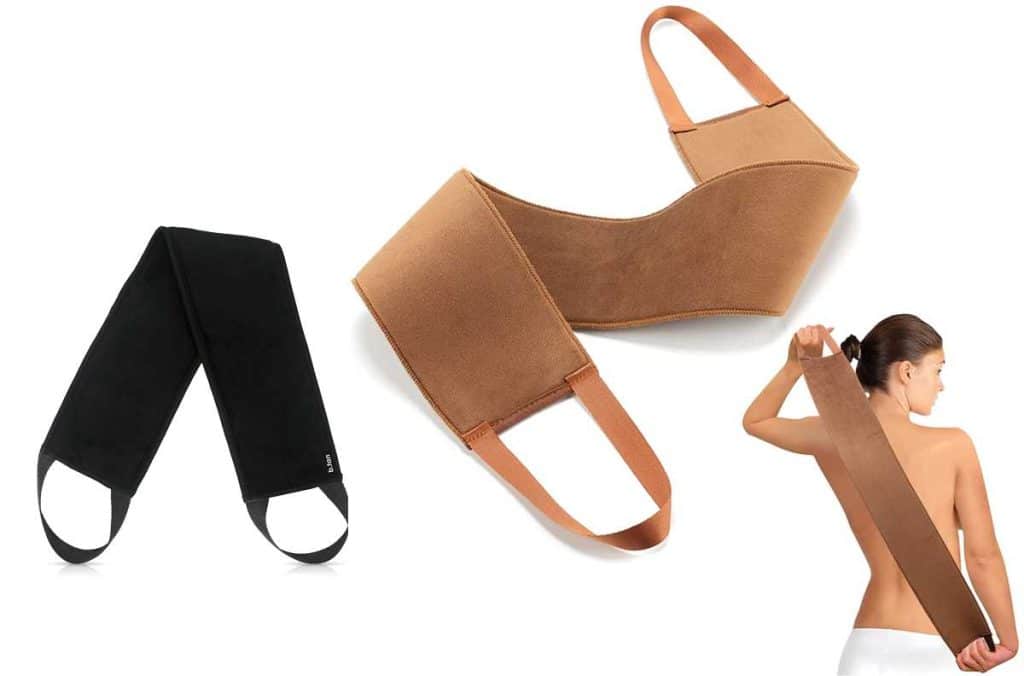
Back Tan Applicator With Band-Aid Design
This type of back tan applicator is designed like a band-aid, only that it’s made with a soft and velvety material that is longer and with two hand handles at each end for you to hold when applying your back tan.
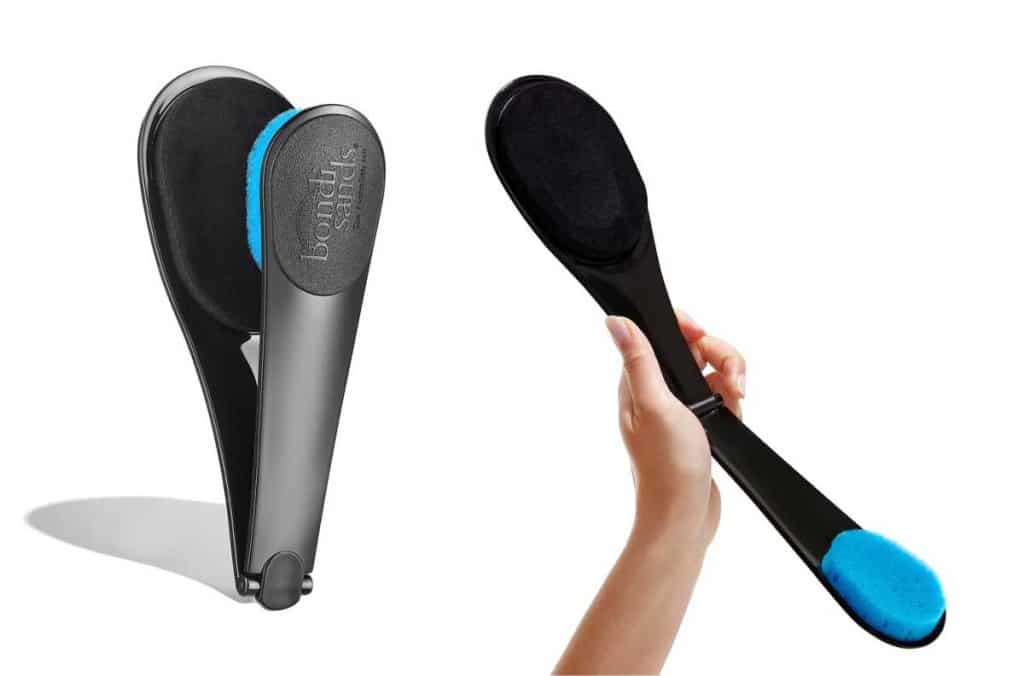
Back Tan Applicator With Sturdy Hand
This type of back tan applicator is designed with long handles and a soft and flexible applicator pad or mitt attached to one end.
Any of the two handy devices is great and will allow you to achieve a beautifully even and streak-free tan on your back, just like a pro! The curved design of the applicator helps you reach all the difficult areas such as your shoulders, spine, and lower back, ensuring even distribution of the self-tanner. With the soft and velvety surface of the applicators, you can easily achieve a flawless tan on your back without needing anyone else’s help.
So, you can say goodbye to the struggle of trying to reach those inaccessible spots at your back and say hello to a perfect back tan with the help of a self tan back applicator.
Preparing for the Back Tan
So, you’ve decided to give yourself a fabulous back tan and achieve that sun-kissed glow all over. Before you embark on your journey to achieve a beautifully bronzed back, it’s essential to properly prepare your skin and gather the necessary supplies. Preparing properly will ensure a smooth and flawless application.
Here’s what you’ll need:
- A self-tanner
- A self-tan back applicator
- A mirror
- A towel
- A pair of gloves
Here are some essential steps to take before you begin:
- Exfoliate: Before applying any self-tanning product, exfoliating your back is crucial. This helps to remove dead skin cells and ensures an even tan. Use a gentle exfoliating scrub or a loofah to gently buff the skin on your back. Pay attention to areas like the shoulders and lower back, which can be prone to dryness and roughness.
- Moisturize: After exfoliation, it’s important to moisturize your back to hydrate the skin and create a smooth canvas for the self-tanner. Choose a lightweight, non-greasy moisturizer that absorbs quickly like the Australian Gold Moisture Lock Tan Extender Moisturizing Lotion. Apply it all over your back, paying special attention to any dry patches or rough areas.
- Gather your tools: To ensure a hassle-free application, make sure you have all the necessary tools ready. Depending on the type of self-tanner you’re using, you may need a mitt, a back applicator, or a spray tan machine. For those hard-to-reach areas, a back applicator or a spray tan machine can be a game-changer. It allows you to apply the product evenly without straining your arm or relying on someone else’s help.
- Choose the right self-tanner: Selecting the right self-tanner for your back is crucial for a natural-looking result. Consider factors like your skin tone and desired level of tan. You can opt for a self-tanner that comes with a guide color, as it helps you see where you’ve applied the product and avoid streaks or missed spots.
- Plan your application: Before you start applying the self-tanner, plan your technique. If you’re using a mitt, squeeze a small amount of self-tanner onto it and apply it in long, sweeping motions, starting from the lower back and moving upwards. Remember to blend the product well into the skin, especially along the edges.
- Take extra care: Since applying self-tanner to your back can be a bit tricky, it’s essential to take extra care to avoid mistakes. If you don’t have a mitt or an applicator, apply the self-tanner with your hands or a nitrile or latex glove as an alternative, using a circular motion to ensure even coverage. Just be sure to wash your hands thoroughly afterward to avoid stained palms.
By following these steps, you’ll be well-prepared to tackle your back tan like a pro. Remember, practice makes perfect, so don’t worry if it takes a few tries to master the technique. With time, you’ll become a self-tanning expert, achieving a gorgeous, sun-kissed back glow effortlessly.
So, let’s dive in and learn how to achieve that flawless, sun-kissed glow on your back all by yourself!
Step-by-Step Guide: How to Apply Self-Tanner to Your Back Yourself Using a Self Tan Back Applicator

Alright, now it’s time to get down to the nitty-gritty of applying self-tanner to your back yourself using a self tan back applicator! This may seem like a daunting task at first, but with a little patience and practice, you’ll be a pro in no time. Here’s a step-by-step guide to self tan your back with a self tan back applicator:
Total Time: 3 minutes
1) Prep your skin:
Before applying any self-tanner, you’ll want to make sure your skin is clean, exfoliated, and moisturized. This will help ensure an even application, contribute greatly to preventing any patchiness, and prolong the life of your tan.
2) Apply the self-tanner to the applicator:
To apply the tanning lotion to the back, squeeze a small amount of self-tanner onto the surface of the self tan back applicator. Start with a small amount at a time and gradually build up the color if needed to avoid streaks and splotches. Remember, it’s easier to add more than to remove excess tanner.
3) Start at the lower back:
Reach behind your back with the self tan back applicator and start applying the self-tanner in long, sweeping motions working your way up. Make sure to cover all areas evenly, including the upper back, lower back, and sides. You can use a mirror to help guide you.
4) Blend as you go:
As you apply the self-tanner, Take your time to be sure to blend it thoroughly to avoid any harsh lines or spots. You can use the edges of the self tan back applicator to blend the self-tanner along the sides and around the shoulders. It’s important to be thorough but gentle to ensure a natural-looking tan.
5) Check your progress:

Take breaks as needed to check your progress using a mirror. This will help you avoid missing any spots or applying too much in certain areas.
6) Touch up as needed:
If you notice any missed spots or areas that need extra attention, use the self tan back applicator to touch them up. Just be sure to blend thoroughly to avoid any harsh lines or spots.
7) Let it dry:

Once you’ve finished applying the self-tanner, allow it to dry completely before getting dressed. This usually takes around 10-15 minutes, but be sure to follow the instructions on the specific product you’re using.
And there you have it! With a little practice, applying self-tanner to your back using a self tan back applicator can be a breeze. Trust me, as someone who has used this method for years, it’s a game-changer when it comes to achieving an even, natural-looking tan on your own. Don’t be afraid to give it a try and see for yourself!
7 Pro Tips for Achieving a Natural-looking Tan With A Back Tan Applicator
- Prep your skin: Before applying self tanner, it’s crucial to prepare your skin for a flawless and natural-looking tan. Start by cleansing and exfoliating your back to remove any dead skin cells and create a smooth canvas for the self tanner. This helps to avoid patchiness and uneven color distribution.
- Blend like a pro: One of the secrets to achieving a natural-looking tan is proper blending. Take your time to blend the self tanner on your back thoroughly. Use long, sweeping motions to distribute the product evenly and avoid any harsh lines or demarcations. Remember to extend the application beyond the back to the sides and shoulders for a seamless transition.
- Check your progress: Take breaks and pause periodically to utilize a mirror during the application process to check your progress, assess the color and coverage of your back. This helps you identify any missed spots or areas that may need additional touch-ups. By taking breaks and using a mirror, you can ensure a consistent and well-blended tan on your back.
- Less is more around joints: Use fake tans sparingly around joints and areas prone to excess color buildup. Joints like elbows, knees, and ankles tend to absorb self tanner more intensely, resulting in darker patches. To prevent this, use a thin layer of your self-tanning product and apply it sparingly around these areas. Take your time to blend and buff the self-tanner carefully to achieve a natural gradient for a seamless transition between these areas and the rest of your back without any obvious color buildup.
- Ask For Help: Consider asking for assistance for hard-to-reach areas if needed. If you find it challenging to reach certain spots on your back, don’t hesitate to seek help from a friend or family member. They can assist you in applying the self tanner evenly and ensure that every area is covered.
- Apply at Night: For best results, apply the self-tanner to your back at night before bed. This will give the self-tanner time to dry completely before you put on clothes. Applying self tanner at night allows it to develop and set overnight, minimizing the risk of transfer onto clothing. So, you just have to wake up with a beautifully bronzed back ready to showcase.
- Wash Your Hands: Be sure to wash your hands thoroughly after applying self-tanner to avoid getting it on other parts of your body. Self-tanners contain colorants that can stain the palms of your hands. Washing your hands immediately after applying your back self-tanner will prevent any unintentional transfer or discoloration.
Remember, practice makes perfect when it comes to self-tanning your back. Don’t get discouraged if your first attempt isn’t flawless. With each application, you’ll gain more experience and achieve better results. So, embrace the process and have fun while achieving a beautiful, natural-looking tan on your back!
Post Back Tan Care and Maintenance (7 Tips)
After successfully tanning your back using a self tan back applicator, it’s essential to take proper care of your skin to maintain its glow and ensure longevity. In this section, we will discuss some essential post-tan care tips and maintenance practices to help you keep that beautiful bronzed look.
- Allow Sufficient Drying Time: Once you’ve applied the self tanner, allow it to dry completely before putting on any clothing. This will prevent smudging or transferring of the product and help maintain an even tan.
- Avoid Water and Sweat: To prolong the life of your tan, it’s important to avoid contact with water or excessive sweating for the recommended time specified on the self tanner’s instructions. Water can cause the tan to fade or become patchy, so be cautious when showering or participating in activities that may cause you to perspire.
- Hydrate, Hydrate, Hydrate: After tanning, it’s crucial to replenish the moisture in your skin. Drink plenty of water to keep your skin hydrated from within. Additionally, using a moisturizer specifically designed for post-tan care will help lock in the moisture and prevent your skin from drying out. Look for moisturizers like the Australian Gold Moisture Lock Tan Extender Moisturizing Lotion that contain ingredients like aloe vera, olive fruit oil, and tea tree oil, as they provide deep hydration and promote skin elasticity.
- Gentle Cleansing: When it comes to cleansing your skin after tanning, opt for a mild and gentle cleanser. Harsh soaps or exfoliators can strip away the tan and leave your skin looking patchy. So, choose a pH-balanced cleanser that is free of sulfates and other harsh chemicals. This will help maintain the natural balance of your skin while effectively removing dirt and impurities.
- Moisturize Regularly: Your skin needs regular and intense moisturization after tanning as it is key to maintaining a healthy-looking tan. Applying a tan-extending lotion or a specialized after-tan moisturizer daily like the Australian Gold Moisture Lock Tan Extender Moisturizing Lotion will help prolong the life of your tan and prevent dryness which will later help the tan fade evenly.
When applying the moisturizers focus on areas that tend to dry out quickly, such as elbows, knees, and ankles. These areas have a higher tendency to fade faster, so giving them extra attention will ensure an even and long-lasting tan.
- Touch-Ups as Needed: Over time, your tan may start to fade or develop unevenly due to natural exfoliation. If you notice any areas that require touch-ups, use a small amount of self tanner on the self tan back applicator to blend and even out the color. Remember to blend carefully and lightly to avoid creating noticeable patches.
- Protect Your Tan: While enjoying the sun, it’s essential to protect your tan from harmful UV rays. Apply sunscreen with an appropriate SPF to shield your skin from sun damage and prevent the tan from prematurely fading or becoming discolored. Opt for a broad-spectrum sunscreen like the Neutrogena Beach Defense Water-Resistant Body Sunscreen Lotion with Broad Spectrum SPF 70 to protect against both UVA and UVB rays.
Remember, proper care and maintenance will help extend the life of your tan and keep it looking natural and radiant. By following these post-tan tips, you’ll be able to enjoy your beautiful, sun-kissed back for as long as possible.
Frequently Asked Questions (FAQs)
What Is The Best Way To Apply Self-Tanner To Your Back?
To apply self-tanner to your back, the best way is to use a self tan back applicator. It allows you to reach all areas easily and ensures an even application. Simply apply the self-tanner to the applicator, start at the lower back, and work your way up using long, sweeping motions.
Can You Apply Self Tanner On Your Back Without a Mitt?
Yes, you can apply self tanner on your back without a mitt by using a self tan back applicator. While a mitt can help with blending on other body parts, the self tan back applicator is specifically designed to reach and evenly distribute the self-tanner on your back.
Can You Spray Tan Your Own Back?
Yes, you can spray tan your own back. One way to do it is by using a spray tan booth or machine with a long reach nozzle. Alternatively, you can use a spray tan aerosol product specifically designed for self-application. Remember to follow the product instructions carefully and use a mirror to ensure even coverage.
How Long Does It Take to Tan Your Back?
The time it takes to tan your back can vary depending on the self-tanning product you use. Generally, it takes about 10-15 minutes to apply self-tanner to your back using a self tan back applicator or spray tan method. However, it’s important to allow sufficient drying time as recommended by the product instructions before getting dressed or coming into contact with water.
How Often Should You Apply Self-Tanner to Your Back?
To maintain a consistent tan on your back, it is recommended to reapply self-tanner every 4-7 days. However, the frequency may vary depending on the specific self-tanning product used. Follow the instructions provided by the product manufacturer for the best results.
What Should You Do If You Notice Uneven Tanning on Your Back?
If you notice uneven tanning on your back, there are a few steps you can take to address it. First, exfoliate the uneven areas gently to even out the color. You can use a body scrub or exfoliating mitt. Then, apply a gradual tanning lotion or self-tanner specifically formulated for touch-ups to the uneven spots. Remember to blend it well for a seamless finish.
Can You Tan Your Back Naturally Under the Sun?
Yes, you can tan your back naturally under the sun. Spending time in the sun without protection can result in a natural tan. However, it is essential to use sunscreen with a high SPF to protect your skin from harmful UV rays. Remember to reapply sunscreen every few hours and seek shade during peak sun hours to prevent sunburn.
How Long Does a Self-Tanner Last on Your Back?
The longevity of a self-tanner on your back depends on various factors, such as the quality of the product, your skin type, and how well you maintain your tan. On average, a self-tanner can last between 4-7 days on your back. To prolong the tan, moisturize regularly and avoid prolonged exposure to water or excessive sweating.

I’m Akin, your dedicated Editor-in-Chief and a fervent skincare enthusiast. Self-care is my true passion, and each year, I embark on a thorough exploration of self-tanning products, ranging from lotions to mists. This forms the bedrock of our commitment to delivering top-notch information to our readers. My extensive research and precise product rankings empower you to make informed decisions tailored to your specific skincare needs.
Unlock the Secrets to Achieving Your Ideal Tan with This Comprehensive Checklist