As an Affiliate, We may earn a commission that doesn't cost you extra from qualifying purchases using links in this post. It helps keeps this blog running.
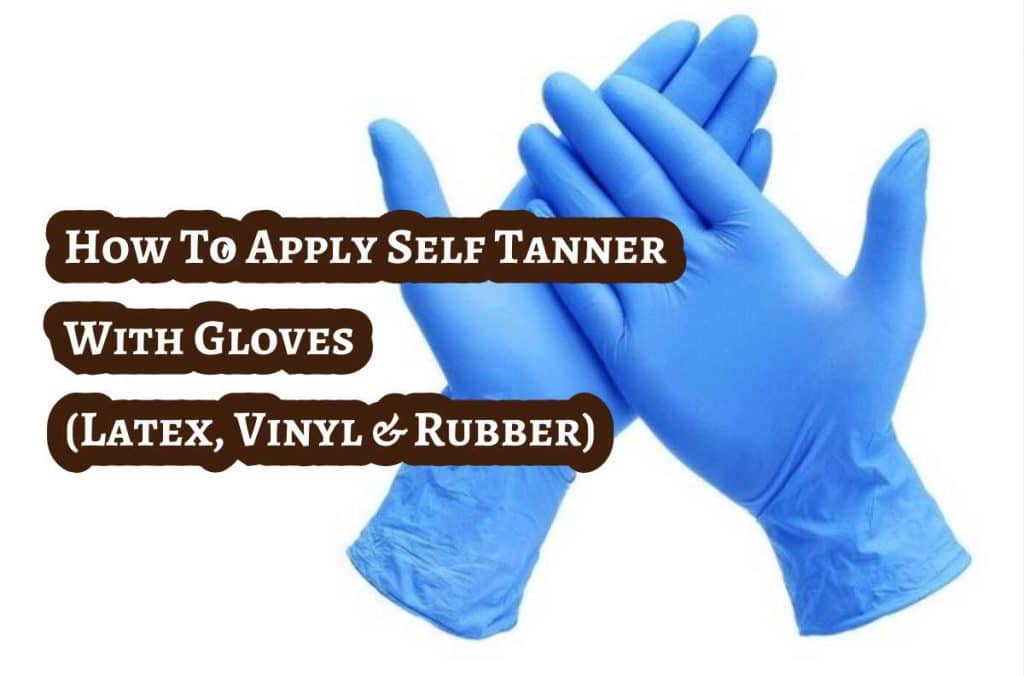
Preparing to achieve a flawless tan without using a tanning mitt? Say hello to your new secret weapon: gloves! While a tanning mitt is a glove itself, using alternative gloves like Latex, Vinyl, Nitrile, and Rubber while applying self-tanner offers the same numerous benefits a mitt does but for a fraction of the cost.
Just like tanning mitts, gloves also act as a protective barrier, ensuring your hands remain free from unwanted color. With gloves, you can also achieve a smooth and even application, avoiding streaks and patchy spots. In this blog post, we’ll explore the different types of gloves – latex, nitrile, vinyl, and rubber – that will become your tanning BFFs, catering to various preferences and skin sensitivities.
Slip on those gloves and get ready to unlock the secrets of a flawless tan! With gloves, you can bid farewell to tanning mishaps and hello to envy-inducing results. Whether you prefer the snug fit of latex, the durability of vinyl, or the grip and protection of rubber, stay tuned for upcoming tips and tricks to achieve that picture-perfect, bronzed goddess look. It’s time to embrace the art of tanning with gloves and take your tan to a whole new level!
Read A Specific Section
Choosing the Right Gloves: How to Choose the Right Gloves for Self-Tanning
When it comes to achieving that flawless tan, applying self-tanner with gloves can be a game-changer. Not only do gloves protect your hands from unsightly orange stains, but they also ensure a more even and streak-free application. Now, let’s dive into the factors to consider when selecting the perfect gloves for your self-tanning adventure.
– Material Matters: Vinyl, Rubber, Nitrile, or Latex Gloves?
When it comes to the material of your gloves, you have a few options to consider: latex, nitrile, rubber, or vinyl gloves. Each type has its own advantages, benefits, and suitability.
- Latex Gloves:
Latex gloves are a popular choice among self-tanning enthusiasts for several reasons. Firstly, they provide a snug and comfortable fit, allowing you to have better control over your tanning application. The flexibility of latex gloves ensures that your movements are not restricted, making it easier to reach those tricky areas like the back of your legs. Additionally, latex gloves offer excellent sensitivity, enabling you to feel the texture of your skin while applying the self-tanner. However, it’s important to note that some individuals may have latex allergies, so if you’re prone to allergies, it’s best to opt for alternative glove materials.
- Rubber Gloves:
Rubber gloves, also known as latex-free gloves, are an excellent alternative for those with latex allergies. Made from synthetic materials like nitrile or neoprene, rubber gloves provide similar advantages as latex gloves. They offer a comfortable fit, allowing you to have precise control during application, and provide a good barrier against tanning products. Rubber gloves are also resistant to punctures to some certain extent, making them durable and suitable for longer tanning sessions. If you’re looking for a latex-free option, rubber gloves are a reliable choice.
- Vinyl Gloves:
Vinyl gloves are another option to consider for your self-tanning endeavors. These gloves are made from a synthetic material called polyvinyl chloride (PVC). Vinyl gloves are known for their affordability, making them a budget-friendly choice. They provide a decent barrier against tanning products and are generally comfortable to wear. However, compared to latex or rubber gloves, vinyl gloves may be less form-fitting and offer slightly reduced dexterity. If comfort and cost-effectiveness are your priorities, vinyl gloves can still get the job done.
- Nitrile Gloves:
Nitrile gloves are a versatile option that is commonly used in various industries, including healthcare and food preparation. They are made from a synthetic rubber material and are highly resistant to punctures, chemicals, and oils. Nitrile gloves offer excellent tactile sensitivity, allowing you to have precise control over your self-tanning application. They are also latex-free, making them suitable for individuals with latex allergies. If you’re looking for a durable and reliable option with enhanced resistance, nitrile gloves are worth considering for your self-tanning routine.
– Comfortability Matters: Tanning Gloves Comfort and Maximum Coverage Tips:
While choosing the right material is crucial, finding gloves that are comfortable and provide maximum coverage is equally important. Here are some tips to help you in that quest:
- Size Matters: Ensure that the gloves fit snugly but not too tightly. Gloves that are too tight may restrict movement and cause discomfort, while loose-fitting gloves can result in a messy application.
- Thickness Considerations: Opt for gloves with an appropriate thickness. Thicker gloves offer better durability and protection against accidental tears or punctures, ensuring a smooth tanning experience.
- Extended Cuff Length: Look for gloves with an extended cuff length to provide additional coverage to your wrists and forearms. This can prevent any unwanted tanning product from coming into contact with your skin.
- Texture and Grip: Consider gloves with a textured surface for enhanced grip. This can be especially helpful when applying self-tanner to ensure a more controlled and even application.
Remember, finding the right gloves for self-tanning is a personal choice based on your preferences and needs. Whether you go for nitrile, rubber, vinyl, or latex gloves, make sure they are comfortable, provide maximum coverage, and allow you to apply your self-tanner with confidence.
Preparing for Application of Fake Tan with Gloves
So, you are ready to rock that beautiful, sun-kissed glow? Before you dive into applying your fake tan or self-tanner with gloves, let’s talk about the essential steps to prepare your skin for a flawless application. It’s all about exfoliation and moisturizing, my friend!
– Exfoliate Your Skin
Let’s start with exfoliation. Exfoliation is an essential step before applying fake tan with gloves, you know, it’s like giving your skin a fresh start! Exfoliating your skin is super important because it helps remove any dead skin cells and rough patches, leaving your skin smooth and ready for that even tan. You wouldn’t want any blotchy areas, would you?
To exfoliate effectively, grab your favorite body scrub or exfoliating mitt and hit the shower. Gently massage the scrub all over your body in circular motions, paying extra attention to areas like elbows, knees, and ankles. Those spots can be a little trickier to tan evenly, so a good scrubbing helps a lot. Rinse off and voila! You’ve just cleared the path for a flawless tan!
– Then Moisturize Your Skin
Now, let’s talk about moisturizing. Hydrating your skin beforehand is just as important as exfoliation and they are both key to achieving a seamless tan. Think of it as giving your skin a nice drink of water before the tan party begins!
Moisturizing helps to soften and plump up the skin, making it more receptive to the fake tan. It also helps to prevent the fake tan from clinging to dry patches or creating streaks.
After exfoliating, pat your skin dry gently with a towel, but make sure to leave it slightly damp. This is the perfect time to apply a lightweight, non-greasy, oil-free moisturizer all over your body. The moisturizer acts as a hydrating barrier, preventing the tan from grabbing onto dry patches and creating uneven color. It’s like a smooth canvas for your tan!
Remember, when choosing a moisturizer, opt for something that doesn’t leave a greasy residue or contain oils. You should slather on the moisturizer at least 4hrs before applying the fake tan so it can soak in and allow time for absorption. You don’t want anything that could interfere with the tanning process.
Step-By-Step Guide To Applying Self Tanner With Gloves (Latex, Nitrile, Vinyl, Or Rubber Gloves)

So, you’ve got your self-tanner and a trusty pair of gloves—latex, nitrile, vinyl, or even rubber gloves will do the trick as the steps of application are all the same! Now, let’s dive into the step-by-step process of achieving that sun-kissed glow without any streaks or orange palms.
Total Time: 5 minutes
Prep your Skin

Before you start applying self-tanner, it’s important to prepare your skin. Begin by taking a warm shower or bath to help open up your pores and soften the skin. While in the shower, use a gentle exfoliating scrub or a loofah to remove any dead skin cells and create a smooth surface for the self-tanner.
Pay extra attention to areas that tend to be rougher, such as your elbows, knees, and ankles.
Choose your self-tanner
When selecting a self-tanner, consider your skin type and desired results. There are various options available, including lotions, sprays, mousses, and gels. Additionally, self-tanners come in different shades, so choose one that complements your natural skin tone. It’s also a good idea to check the product label or consult the manufacturer to ensure compatibility with the type of gloves you’ll be using.
Put on your gloves

To protect your hands from getting stained, it’s time to put on your gloves. You can use latex, nitrile, vinyl, or rubber gloves – whichever you prefer or have available. Make sure the gloves fit comfortably but snugly, allowing you to maintain a good grip and control while applying the self-tanner.
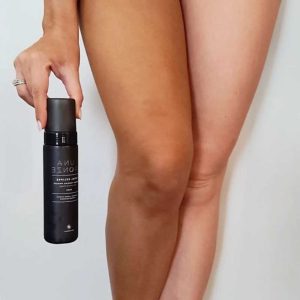
Dispense the self-tanner
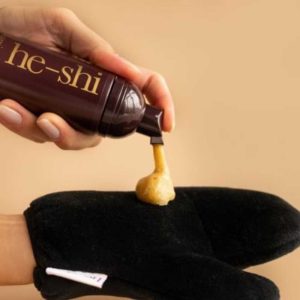
Squeeze a small amount of self-tanner onto the palm of your gloved hand. Start with a quarter-sized dollop to avoid using too much product initially. You can always add more if needed during the application process. Remember, it’s better to start with less and build up gradually to achieve your desired level of tan.
Begin the application

Starting with your legs, apply the self-tanner in smooth, circular motions. Use your gloved hand to massage the product into your skin, blending it well as you go. This technique helps to ensure even coverage and prevent any streaks. Take your time and work methodically, focusing on one area at a time. Continue applying the self-tanner to your thighs, calves, and ankles, making sure to reach all the way down to your feet.
Move to your upper body

Once you’ve finished applying the self-tanner to your legs, it’s time to move on to your upper body. Apply the self-tanner to your arms, starting with your shoulders and working your way down to your wrists. Use the same circular motion and make sure to cover all areas evenly. For your chest, stomach, and back, reach behind or ask for assistance to ensure thorough application.
Be mindful of tricky areas
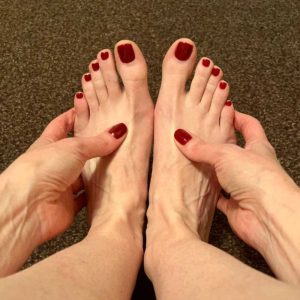
Certain areas require extra attention to ensure a natural-looking tan. When applying self-tanner to your hands and feet, use a smaller amount of product and blend it carefully, paying attention to the ankles, heels, knuckles, fingers, and the spaces between them.
Be cautious not to overapply self-tanner between the toes and fingernails, as it can gather and create an unnatural appearance. To avoid an unnatural color, lightly sweep the self-tanner over the tops of your hands and blend it down to your wrists.
For your face, apply a minimal amount of self-tanner using your gloved fingers, focusing on the cheeks, chin, forehead, hairline, and jawline. Be sure to blend well and avoid the delicate eye and lip areas. It’s advisable to use a mirror and natural lighting to ensure even coverage and avoid any potential mishaps.
Double-check for any missed spots

After you’ve finished applying the self-tanner to your entire body, take a moment to check for any missed spots or uneven areas. Use the remaining self-tanner on your gloves to touch up those spots. Gently blend and smooth out any inconsistencies, ensuring an overall balanced and natural-looking tan.
Let it dry

Once you’ve completed the application, it’s crucial to allow the self-tanner to dry fully. Follow the recommended drying time specified on the product label. During this period, it’s best to avoid putting on tight clothing or coming into contact with fabrics, as it could lead to smudging or transferring the self-tanner onto your clothes. Consider wearing loose, dark-colored clothing until the self-tanner has completely dried.
Wash your hands
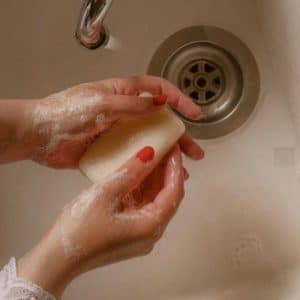
After removing the gloves, it’s time to give your hands a thorough wash. Use soap and water to cleanse your hands and ensure the removal of any self-tanner residue. Pay attention to the areas between your fingers and under your nails, as these places tend to accumulate product. This step helps prevent any unwanted staining on your palms and ensures that your hands look as natural as the rest of your body.
And voila! You’ve successfully applied self-tanner with gloves, ensuring a beautifully bronzed and streak-free tan. Remember to moisturize regularly to maintain your tan and reapply the self-tanner as desired.
7 Pro Tips for a Flawless Tan When Using Gloves For Tanning
Here are some playful tips and techniques for achieving a flawless tan, with a focus on even coverage, blending, and avoiding streaks or missed spots:
- Prep like a pro: Before applying your fake tan or self-tanner with gloves, it’s essential to prepare your skin properly. Start by exfoliating your body to remove any dead skin cells and ensure a smooth canvas. This helps prevent patchiness and ensures even absorption of the tanning product.
- Moisturize strategically: Dry areas like elbows, knees, and ankles tend to absorb more tanning products, resulting in darker patches. To avoid this, moisturize these areas lightly before applying your tan. This creates a barrier and helps prevent excessive absorption, ensuring a more even tan.
- Choose the right tanning product: Opt for a high-quality fake tan or self-tanner that suits your skin type and desired results. Consider factors like the formula (lotion, mousse, spray, etc.), shade intensity, and application method. Following the instructions on the product is crucial for the best results.
- Apply in sections: To ensure even coverage and avoid missed spots, it’s best to work in sections. Start with your legs and work your way up, applying the tanning product in circular motions. Take your time and blend well, ensuring you cover each area thoroughly before moving on.
- Blend with care: Blending is key to achieving a natural-looking tan. When applying the product, pay attention to areas where lines might appear, such as wrists, ankles, and the neck. Use light, sweeping motions and blend the product into these areas for a seamless transition and to avoid any telltale signs of a fake tan.
- Take extra care on tricky areas: Certain areas, like hands, feet, and the face, require special attention to avoid an uneven tan. For these areas, use a minimal amount of tanning product or mix it with moisturizer for a more subtle effect. Blend carefully and remember to wash your hands immediately after application.
- Double-check and touch up: Once you’ve applied the tan all over your body, take a close look in the mirror to spot any missed spots or streaks. Use a damp cloth or a cotton pad to gently blend and touch up these areas. Pay attention to the back of your hands, the back of your neck, and behind the ears.
Remember, practice makes perfect when it comes to self-tanning. Don’t get discouraged if your first attempt isn’t flawless. With time and experience, you’ll become a pro at achieving an even, streak-free tan!
Tan Post-Tan Application Care: Maintaining and Caring For Your Skin After Tanning
When it comes to applying your fake tan or self-tanner with gloves, it’s not just about the application itself. The post-tan application care plays a crucial role in ensuring a beautiful and long-lasting tan. So, let’s dive into the importance of taking care of your skin after applying tan with gloves.
- Give It Time To Develop:
Once you’ve successfully achieved that sun-kissed glow using gloves, it’s essential to allow the product to fully develop on your skin. This means giving it enough time to work its magic before coming into contact with water or engaging in any activities that may cause excessive sweating. By doing so, you can maximize the effectiveness of the tan and avoid any unwanted streaks or patches.
- Stay Moisturized:
To maintain the longevity of your tan, it’s important to keep your skin moisturized. After applying tan with gloves, consider using a gentle, hydrating lotion or moisturizer regularly. This helps to prevent the skin from becoming dry, which can lead to the tan fading more quickly. Hydrated skin also tends to hold onto the color better, giving you a more even and vibrant result.
- Avoid Harsh Soaps & Exfoliation:
Remember to be gentle when showering or bathing after applying tan with gloves. Avoid using harsh soaps or exfoliants that may strip away the color prematurely. Opt for a mild, moisturizing body wash instead, and pat your skin dry gently with a towel afterward. This gentle approach will help maintain the tan’s longevity and keep it looking fresh and natural.
- Minimize Stress:
Another important aspect of post-application care is avoiding activities that could cause excessive sweating. Sweating can lead to the tan wearing off unevenly or even completely. So, try to avoid intense workouts or activities that may make you perspire excessively immediately after applying the tan. Instead, give it some time to set and develop before engaging in such activities.
By following these post-application care tips, you can make the most out of your tan and enjoy a gorgeous, sun-kissed look for an extended period. So, remember to keep giving your skin the care it deserves even after applying tan with gloves!
Do I Need A Glove To Self-Tan? Why Use Gloves for Applying Self Tanner Instead Of A Mitt
Well, technically, it’s not an absolute necessity. You can definitely apply self-tanner without gloves, using your bare hands. However, opting for gloves can greatly enhance your self-tanning experience and deliver better results.
While you can certainly use a tanning mitt instead of gloves, using gloves for applying self-tanner offers a bunch of benefits that make it a preferred choice for some people over a tanning mitt. First and foremost, gloves provide a snug fit and excellent flexibility, allowing you to have full control and precision while applying the self-tanning product. With gloves, you have better control over the amount of product you apply and can evenly distribute it on your skin. Tanning mitt alternatives like latex gloves are easily available and relatively inexpensive.
But why use gloves specifically instead of a tanning mitt, you ask? Well, gloves are made of a material that is typically thinner and more form-fitting than a tanning mitt, which can allow for more dexterity and flexibility when applying the product. Additionally, some people find that tanning mitts can soak up too much of the self-tanner, which can lead to a less even application and excessive waste of the tanning lotion.
So, let’s talk about whether you really need a glove to self-tan and explore the reasons why using gloves for applying self-tanner is highly recommended.
- No More Stained Palms: Applying self-tanner directly with your hands can often lead to unsightly orange palms. Trust me, nobody wants to walk around with Oompa-Loompa’s hands. By using gloves, you create a barrier that prevents the tanning product from staining your palms. This way, you achieve a more even and natural-looking tan without worrying about telltale signs on your hands.
- Avoid Uneven Application: Gloved hands provide a smooth surface for applying self-tanner. When you use your bare hands, there’s a chance that the product may be absorbed into your skin unevenly or leave streaks. Gloves, on the other hand (pun intended), help ensure a more uniform application by allowing you to glide the self-tanner across your skin seamlessly. This results in a flawless, streak-free finish.
- Hygiene Matters: While self-tanning can be loads of fun, it’s essential to consider hygiene as well. Gloves act as a hygienic barrier between your hands and the tanning product. This reduces the risk of transferring bacteria or other contaminants from your hands onto your skin. So, not only do gloves help you achieve a gorgeous tan, but they also maintain cleanliness throughout the process.
- Cost-Effective Solution: Gloves can be a cost-effective option when it comes to self-tanning. Disposable latex gloves, for instance, are generally affordable and readily available in packs. You can find them at most drugstores, beauty supply shops, or even online. By using gloves, you save money on the immediate huge purchase of specialized tanning applicators or mitts, making it a budget-friendly choice.
- Easy Disposal: Once you finish applying the self-tanner, one of the perks of using disposable gloves is the convenience of disposal. Simply remove the gloves, discard them in a trash bin, and you’re done! There’s no need to worry about washing and cleaning reusable mitts or brushes, saving you time and effort.
- Versatile and Multi-Purpose: Even though it’s not advised to use your tanning gloves for other purposes, gloves, particularly latex ones, have uses beyond self-tanning. They can be utilized for various tasks such as cleaning, painting, gardening, or handling potentially messy substances. This versatility makes gloves a practical investment, as you can repurpose them for other activities around the house.
- Minimize Product Waste: When you apply self-tanner with gloves, you have better control over the amount of product you use. Gloves allow you to distribute the self-tanning lotion or mousse evenly without excess waste. This way, you maximize the efficiency of your tanning product, ensuring it lasts longer and providing more value for your money.
- Protect Your Nails: For those who want to keep their manicure intact while self-tanning, gloves are a savior. The gloves act as a protective barrier, preventing the self-tanner from staining or discoloring your nails. This is especially beneficial if you’ve recently had a professional manicure or want to maintain a polished look.
So, if you are the type that is comfortable applying self-tanner with your bare hands or with a tanning mitt, then go for it! But, if you’re worried about getting a patchy or unnatural-looking tan, then using gloves can be a great option. Just make sure to choose gloves that are made of a non-porous material, like latex, rubber, vinyl, or nitrile, to avoid any unwanted absorption of the product.
Frequently Asked Questions (FAQs)
Can I apply self-tanner with latex gloves?
Yes, latex gloves are a great option for applying self-tanner. They offer good control and flexibility, allowing you to evenly distribute the product across your skin. Latex gloves provide a barrier between the tanner and your hands, preventing them from getting stained.
Can I reuse the gloves for multiple self-tanning sessions?
Yes, gloves can be reused for multiple self-tanning sessions. However, it is important to clean them thoroughly after each use to avoid any transfer of product or bacteria.
Can I wash and reuse latex gloves for self-tanning?
No, you should not wash and reuse latex gloves. Latex gloves are not typically recommended for reuse due to their thin nature. It’s best to dispose of latex gloves after each use and use fresh ones for subsequent applications.
Is it necessary to wear gloves when applying self-tanner?
Yes, it is highly recommended to wear gloves when applying self-tanner. Gloves protect your hands from getting stained and ensure an even application. They also prevent the tanner from absorbing into your hands, which can result in an uneven tan.
Can I use vinyl gloves instead of latex gloves for applying self-tanner?
Absolutely! Vinyl gloves are a suitable alternative to latex gloves for applying self-tanner. They offer similar protection and control, allowing you to achieve an even and streak-free tan. Choose gloves that fit comfortably and provide a snug fit for optimal results.
How do I remove gloves without smudging the self-tanner?
To remove gloves without smudging the self-tanner, follow these steps: Slowly peel off the gloves starting from the wrist and pulling towards the fingers. Be cautious and gentle while removing them to avoid transferring the tanner onto your skin or clothes.
Should I exfoliate my skin before applying self-tanner with gloves?
Yes, it is recommended to exfoliate your skin before applying self-tanner with gloves. Exfoliation helps remove dead skin cells and creates a smooth surface, allowing the tanner to adhere evenly and last longer. Use a gentle exfoliating scrub or mitt to prepare your skin before tanning.
Can I use rubber gloves for applying self-tanner?
Yes, you can use rubber gloves for applying self-tanner. However, keep in mind that rubber gloves may provide less dexterity compared to latex or vinyl gloves. Ensure that the rubber gloves fit well and allow you to effectively apply the self-tanner for a smooth and flawless finish.
How do I ensure an even tan when using gloves?
To achieve an even tan when using gloves, apply the self-tanner in gentle circular motions, working your way across the skin. Blend the product well into the skin, ensuring there are no visible streaks or patches. Pay extra attention to areas such as knees, elbows, and ankles to ensure even coverage.
Do I need to moisturize my skin before using gloves to apply self-tanner?
Yes, it’s recommended to moisturize your skin before using gloves to apply self-tanner. Moisturizing helps hydrate the skin, making it smoother and more receptive to the tanner. Apply a light, oil-free moisturizer at least an hour before tanning to ensure it has fully absorbed into the skin.
Can I use gloves to apply self-tanner on my face?
While gloves can be used for applying a self-tanner on the face, it’s generally recommended to use a tanning mitt or apply the self-tanner with your hands for better control and precision. The delicate facial skin requires extra care and attention during application.
How long should I wait before removing the gloves after applying self-tanner?
Wait until the self-tanner has fully absorbed into your skin before removing the gloves, usually around 10-15 minutes. This allows the tanner to penetrate and develop evenly. Follow the instructions provided with the self-tanner product for the best results.

I’m Akin, your dedicated Editor-in-Chief and a fervent skincare enthusiast. Self-care is my true passion, and each year, I embark on a thorough exploration of self-tanning products, ranging from lotions to mists. This forms the bedrock of our commitment to delivering top-notch information to our readers. My extensive research and precise product rankings empower you to make informed decisions tailored to your specific skincare needs.
Unlock the Secrets to Achieving Your Ideal Tan with This Comprehensive Checklist